Making a 3x3x4 from a standard 57mm 3x3x3
I have always been intrigued by the NxNxM series of cube variants. Ever since the idea was first put forth by Tony Fisher to bandage an existing puzzle and create something new from it I was completely hooked with the idea.
Aside from trivial variants the idea of higher order puzzles has always captivated my imagination.
Here is a partial list of possible NxNxM puzzles:
1x1x2 ...
2x2x1 Morph Ball, various
2x2x3 Tony Fisher
2x2x4 various
3x3x2 Domino, Tony Fisher
3x3x4 Katsuhiko Okamoto, Tony Fisher
3x3x5 Glen A. Heller, Katsuhiko Okamoto
4x4x5 Tony Fisher, Aleh Hladzilin
4x4x6 Tony Fisher
5x5x6 (None known)
5x5x7 (None known)
The first creation of the 3x3x4 was the "Phantom Cube" by the incomparable Katsuhiko Okamoto of Japan in 2002. The dimensions of the puzzle matched that of a standard 66mm Rubik's Revenge, thus was slightly smaller than that puzzle by one row of cubes. His access to a machine shop virtually guarantees that his considerable skill with puzzles can be put to best use. As a result his puzzles are unmatched in quality or precision and can almost be considered "factory made."
The second iteration of the 3x3x4 came from the reknowned Tony Fisher in 2003. Using his pioneering methods he bandaged the relatively new Eastsheen 4x4x4 into the 3x3x4 and presented the puzzles at a Cube enthusiast gathering in Europe (Dutch Cube Day 2003?). Naturally given the method the puzzle is a bit on the larger side and its exact dimensions unknown to me. (roughly 75 mm x 100 mm)
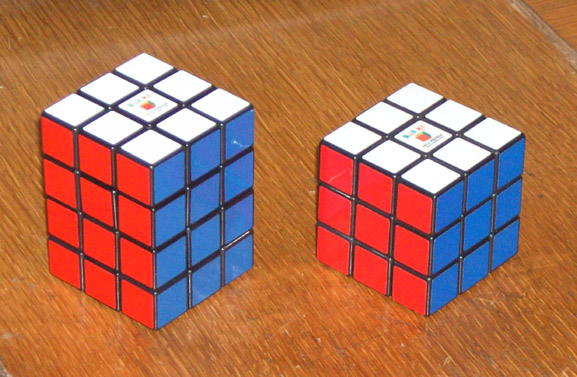
Having been a fan of the Rubik's Cube and its wonderfully simple mechanism I have always wondered if there was not a way to build a 3x3x4 using the existing 3x3x3 mechanism. Aside from the challenge aspect, I felt the puzzle would be the most aesthetically pleasing, having comparable dimensions to the well known 57mm 3x3x3 size.
After working on the puzzle off and on for a number of years, I finally came to the conclusion that the puzzle would not only be buildable from a 3x3x3 core, but the puzzle could be almost entirely built from hand tools and Time. Its eventual dimensions would be 57mm x 57mm x 76mm.
Presented here is the picture library for making a fully functional 3x3x4 from three 3x3x3 Rubik's Cubes.
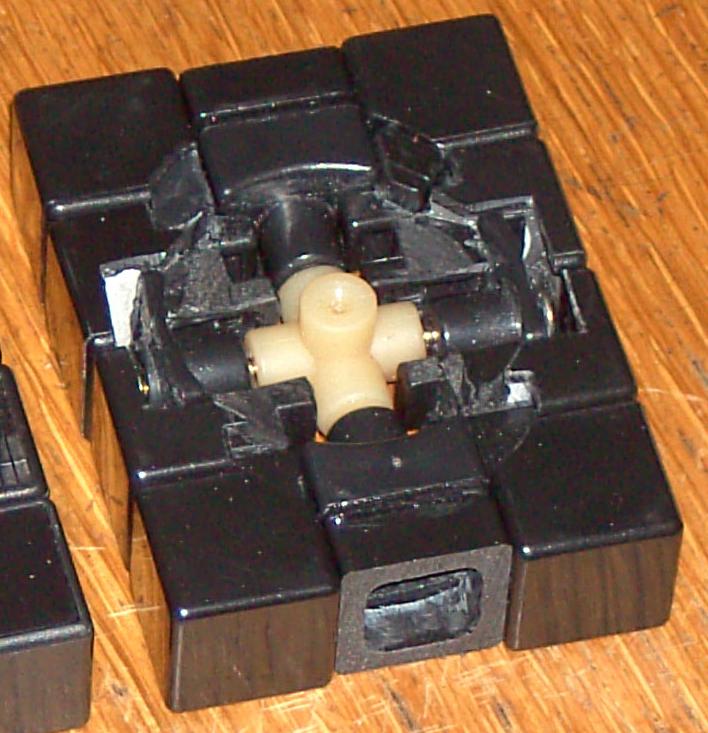
Theory - The internal mechanism of the rubik's cube is a circle approximately 38mm in size. Every tongue that glides over this internal circle has a small curve to it that conforms to this. The concept is not as obvious with a flat centered cube but is very easy to see with arched center cubes. Just remove the top layer and you can see how the pieces interact.
The basic concept is to shift every piece by 9mm, or half the width of a cubelet. If the pieces can be effectively shifted and still leave enough of the tongue remaining to keep the pieces secure within the 38mm circle, then theoretically the pieces should stay in place.
Now let's get to building.
Recipe:
1 Rubik's Cube core
8 layer 2 & 3 edges
8 layer 2 & 3 centers
8 layer 1 & 4 corners
8 layer 1 & 4 edges
4 layer 2/3 internal edges
Arched center DIY rubik's cube with adjustable screws recommended. Flat centered puzzles not recommended.
The internal edges should be taken from any spare edge pieces you may have. If you're a puzzle modifier, the edges of a Rubik's Cube are the most frequent leftovers aside from the cores. If you have leftover edges then you do not need to sacrifice a third cube and can get away with just mangling two of them.
Make a circle template! - a roughly 38mm stencil will be a great tool in this case. Make it out of a bit of plastic sheet or even some construction paper. Draw a pattern with a compass and then very slowly and carefully cut out the circle with a hobby knife. Scissors will be kind of a crude approach. If at all possible try to save the circle you cut out. The circle will also help with tolerances later.
If you're not sure exactly how wide the circular stencil needs to be, just take one layer off the puzzle including the center. Lay the pieces together upside down on a flat surface.
Puzzle core - four out of six center cubelets need to be cut down. I will state the obvious and say that two opposite centers need to be intact. Shave them down so that only about 1/16" worth of the center core remains. Just look at the picture.
Layer 1 & 4 centers -
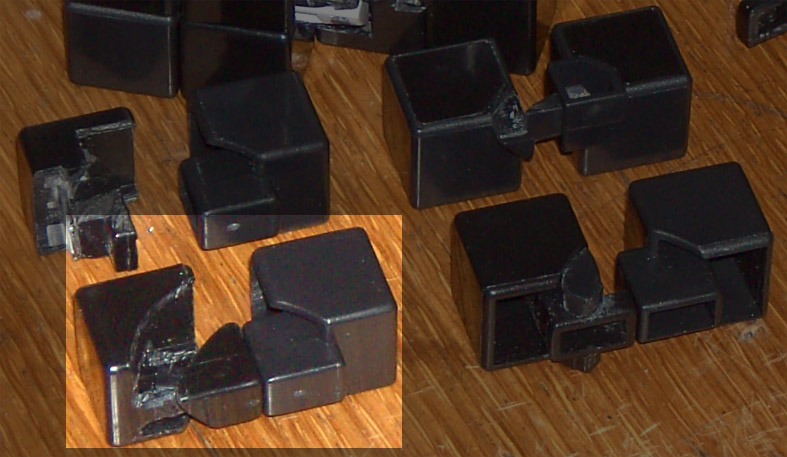
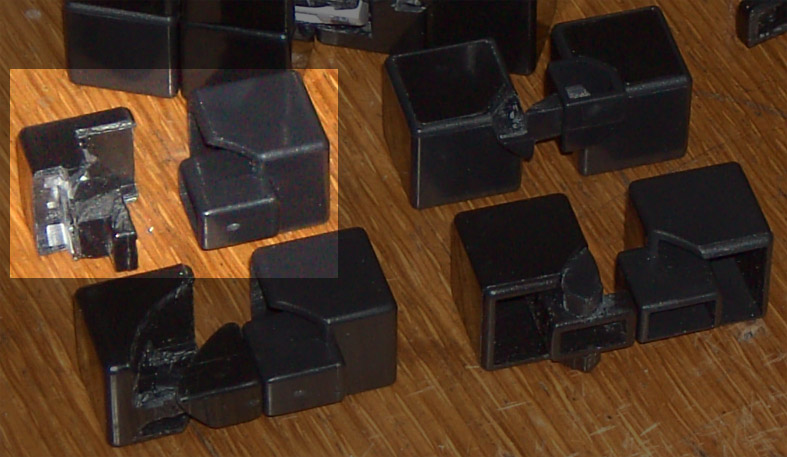
Layer 1 & 4 corners -
Layer 1 & 4 edges -

Edges need to be padded as well. The extra plastic serves two distinct purposes. First, the extra plastic lends greater stability and resistance to popping. Popping these edge pieces is VERY easy when the puzzle is turned lengthwise at 45 degreesb and the additional plastic reduces this tendency.
The other (and more important) reason for adding more plastic is to allow the modified corner pieces to glide smoothly during lengthwise turns. If you don't do this, corner pieces will pop loose at about the 45 degree turning point. This is a critical step and most definitely not optional.
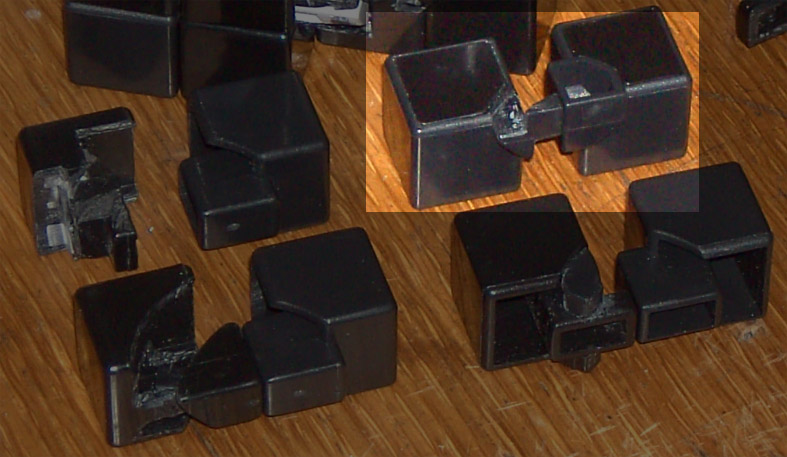
Layer 2/3 internal edges -
Layer 2 & 3 edges -
One layer 2 & 3 edge needs to have a layer 2/3 internal edge glued directly to it. This movement block will keep the internal mechanism aligned with the layers that move above it. Because of the way that the internal pieces are actually spaced inside the puzzle, it would be a good idea to glue a small sheet in the middle between the two pieces. This allows some natural spacing that normally occurs.
Layer 2 & 3 middles -
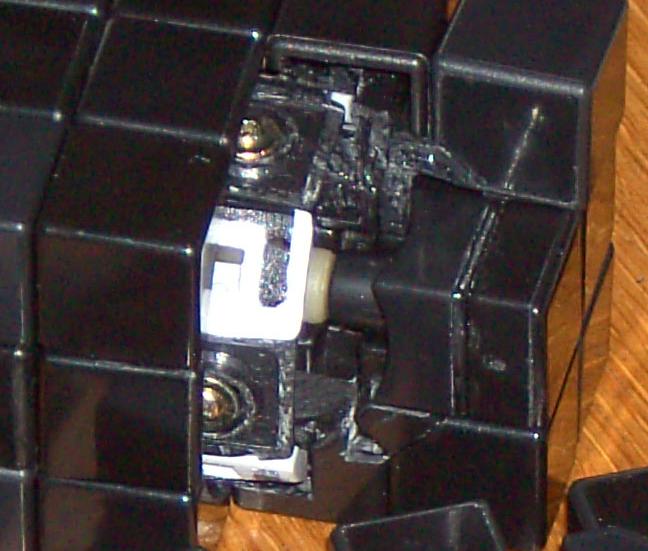
My choice was JB Weld, which when cured has properties very similar to the Milliput/Magic Sculp/Apoxie Sculpt that modders are very familiar with. However unlike those putties, JB Weld flows thickly and takes hours before it sets up and is VERY sticky. This allowed me to pour in the JB Weld and let it flow down to every part of the puzzle that needed filling in before cutting, yet is much more durable and resilient than clear two part epoxy. Regular epoxy might be sufficient, however.
Afterwards a small piece of plastic was affixed on the inside to keep the middle track gliding smoothly. Initially I thought that this would be an optional step, but I found that it is pretty much a mandatory thing to do. Those tracks allow everything to stay aligned internal while the puzzle is being scrambled, so they must exist.
Final notes:
Every internal edge needs to be rounded and smoothed - This is a crucial step and should not be skipped. Smoothing everything on the inside will allow puzzle pieces to move past each other in case there are some imperfections within. You don't need to be extremely careful how you round edges, you just need to make sure that there are no sharp points or corners. At the minimum you will want to take your hobby knife and scrape down any edges that meet at a 90 degree angle.
When the puzzle is turned 90 degrees the outside layer edges tend to pop out easily. Just push on the piece and it will come dislodged. Unfortunately there is no great way to resolve this issue. About the best thing you can do is to create a very small groove into the layer 2 & 3 pieces and then create a small foot that helps keep the edge piece in place. However I do not think this is a critical process to go through. Under normal circumstances the puzzle is quite stable. This "flaw" also allows easy disassembly of the puzzle without having to be over-delicate about keeping the puzzle together while solving.
I did not say that this method wasn't an involved process. It does take Time and skill to get it right. When only partially assembled the puzzle falls apart easily. Even as I was building it I had some questions about how stable the puzzle would be. However with perseverance it is possible to create your own stable puzzle. Sure it may take a month or more, but isn't the reward justifiable to be able to own one of the most exclusive puzzles ever?
That question can only be answered by you, dear reader.