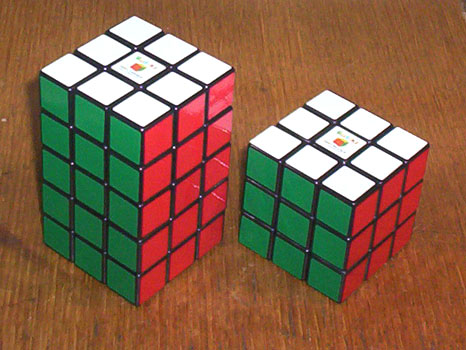
The fully functional 3x3x5 puzzle is an extension of the normal 3x3x3 Rubik's Cube. The puzzle is fully realized with fully turning external layers. Inspiration for this puzzle is drawn from a picture seen of such a puzzle created years ago by Mr. Glen A Heller and subsequent work done by Mr. Katsuhiko Okamoto.
The purpose of this puzzle exercise was to try and demonstrate the feasibility of creating such a puzzle with a modest degree of skill. This puzzle is not as challenging to create as a 2x2x3 Slim Tower or a 2x3x3 Domino clone, however it does take a significant length of Time to fabricate all of the necessary pieces even when the work is simplified.
The raw materials needed to create this puzzle are simple to gather. Two 3x3x3 Rubik's Cubes are needed plus some plastic sheet of some kind. Ideally the plastic sheet should be at least 1/8" or 2-3mm in thickness. The plastic sheet does need to be stiff.
Due to the amount of labor necessary to construct this puzzle and my recent trend of never having enough hours in the day this puzzle will no longer be sold by myself on a per-order basis.

Construction notes:
It is not my intention to spend a lot of Time fabricating this puzzle for others so I will publish as many notes about construction as I can in this page along with step-by-step pictures. What greater challenge than to make your own puzzle?
Step 1: Mark and cut your lines
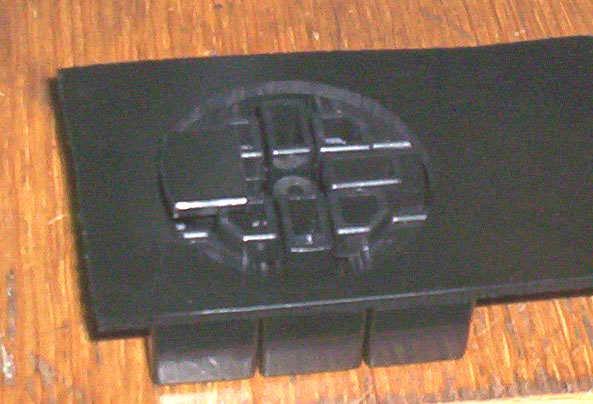
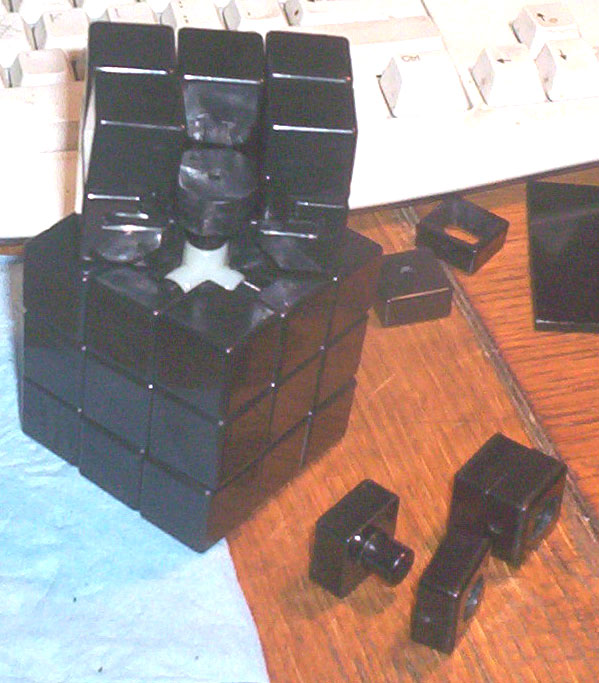
The first step is probably the most crucial in making a properly aligned puzzle. Determine the width of the tongues of the puzzle and then mark out the exact diameter on top of one of the puzzles. Make sure that the circle is centered as close as possible to the center of the puzzle.
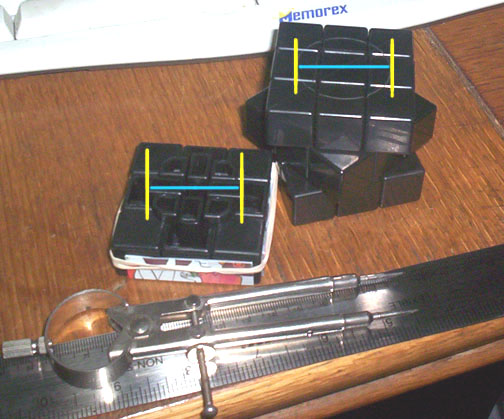
Be sure that you cut down to a minimum of the depth as indicated by the area marked in blue. You can cut farther down since you also have to cut for the thickness of the plastic sheet. It's ok if you cut a little too deep but be absolutely sure you do not too too deep against the line drawn by the compass. If anything you will want to cut that part a bit shallow and then go back later with a file for fine tuning.
Test fit a layer of cubes into the newly cut hole at the top of the puzzle. Remember, it's better to have it a little too tight than too loose at first.
Step 2: Make tongues
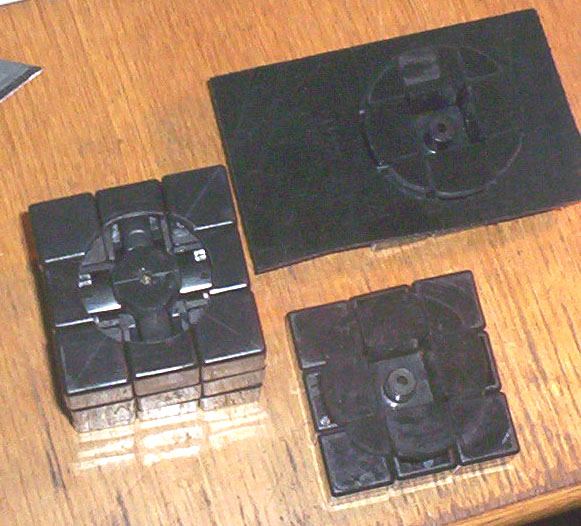
You do not have to make a template for this part, but it does help. This will give you a visual guide for making the tongues from plastic sheet. This template will also help you keep a nice circle to the pieces. This will help later to ensure smooth rotation of the outer layers. Use the natural uniformity of the Rubik's Cube tongues to glue the sheets on. Alignment will be almost a non-issue if you make sure to take advantage of the existing shape of the tongues before you cut them down.
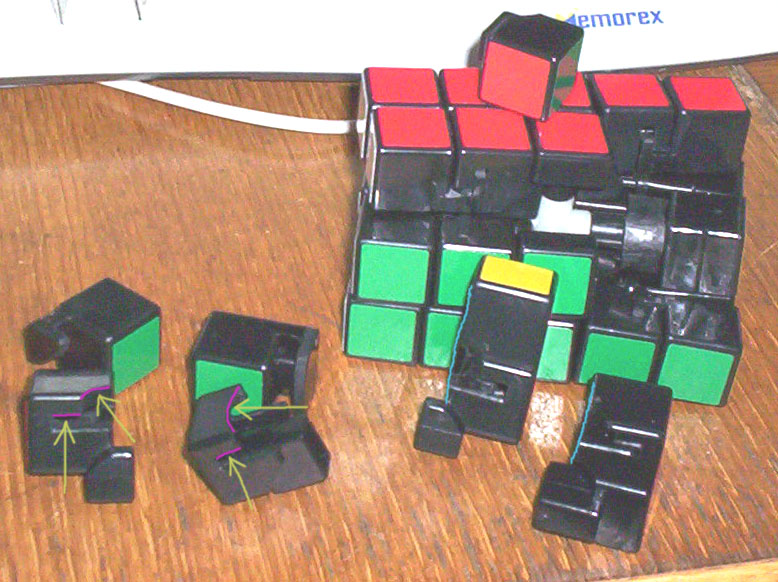
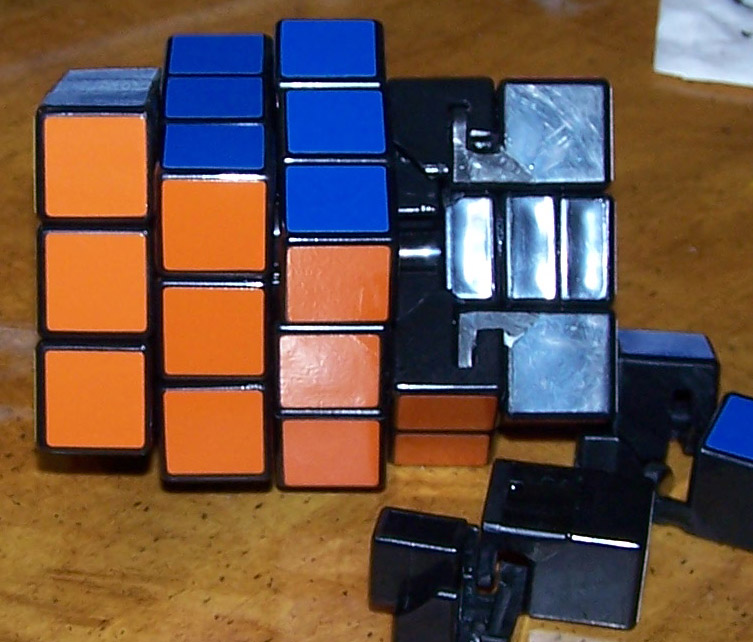
In this picture all of the corner and edge pieces have been cut down into cubes and every piece has been fitted with a plastic sheet. Roundness is checked for with the template. The center axis has also been rounded in the base cube to allow the outside layer pieces to rotate around it.
Remember, the really important parts are the original circle cut into the base cube and how smooth and uniform that circle is. That is the piece that actually holds the outer layers in alignment. The extra plastic sheet is just to keep the pieces from falling out and do not have to be perfectly circular.
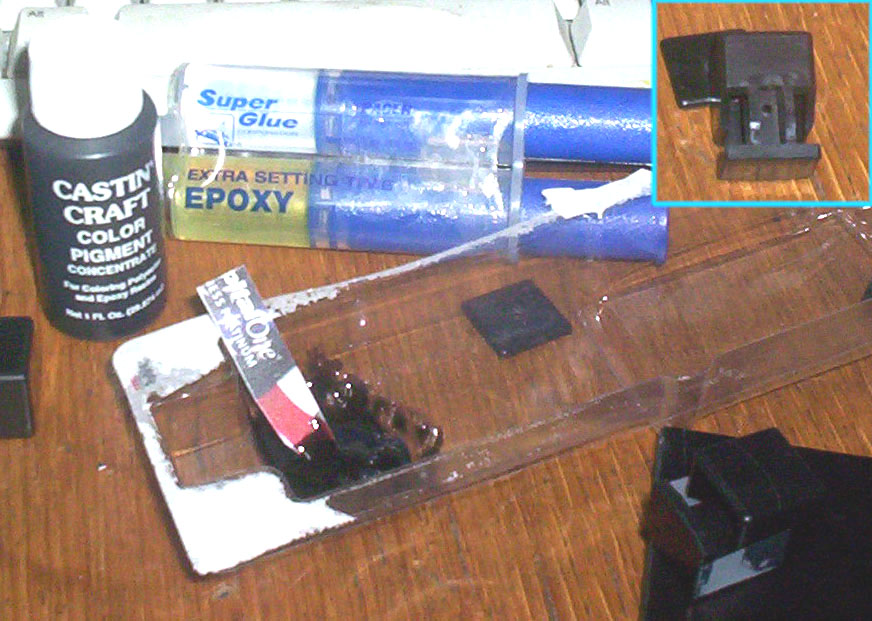
You will probably want to fill the gaps in the puzzle so that when scrambled the pieces don't have big holes in them. I used some scotch tape, some slow setting epoxy, and some black pigment to fill the gaps. After the epoxy cures you just remove the scotch tape and wipe off any tape residue with alcohol. I use slow setting epoxy so that it can pour into the gaps bordered by the scotch tape. Afterwards you can easily scrape/cut/trim off any excess epoxy while it's close to being cured. Make sure you have no epoxy on the tongues of the pieces.
Even if you do not use pigmented epoxy to fill gaps, you will need to strengthen the corner cubes somehow. A little cyanoacrylate glue will not hold the plastic sheet to the bottom of the cube for very long. I used epoxy there too for more strength but you can probably do just as well by using a soldering iron to melt plastic into a joint.
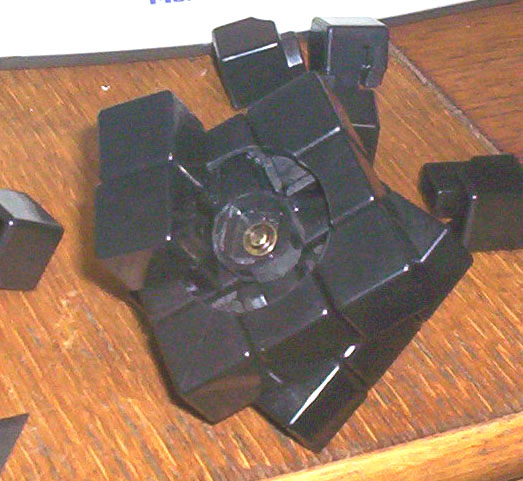
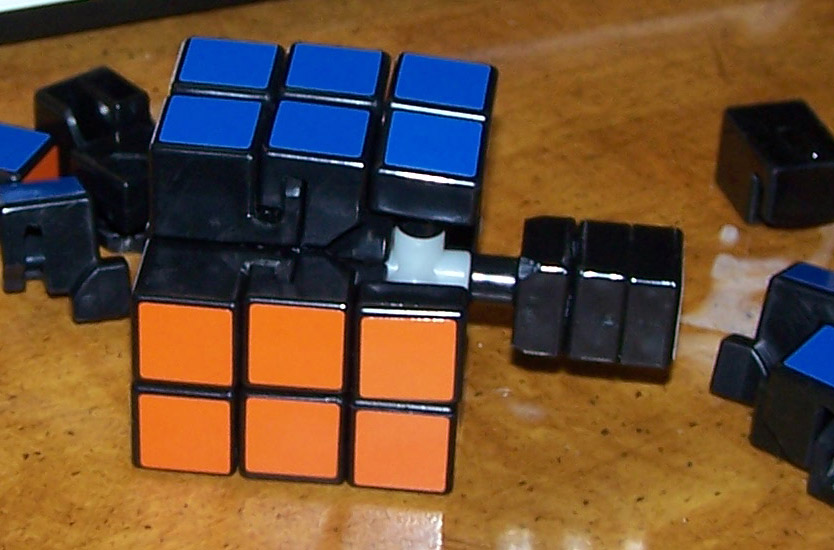
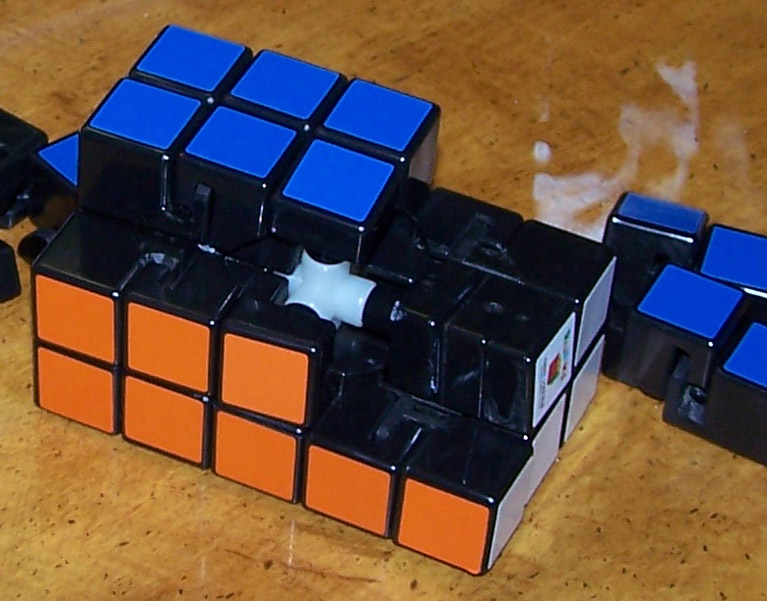
Here is a test fit for the pieces. The middle cube has been rounded so that the outer layers can rotate around it. Make sure that the pieces move smoothly around the axis. You can always sand and file to make the pieces move a little more easy, but you cannot make the pieces fit snugly if you took off too much material.
Step 3: Final assembly
Here is a picture of the assembly of the middle cube extension. Luckily on a Rubik's Cube the two middle pieces sandwiched together are exactly the same dimensions as other cube pieces. Take two middle pieces, modify one so that it has a hole clear through it, glue the two parts together, and then secure it with a long screw. This is easily accomplished if you have a Studio Cube or any other cube that uses screws for tension. However on a Studio Cube the center pieces are domed as opposed to flat so would not be suitable for this simple center piece trick. If you have one that uses rivets you can accomplish almost the same thing by reversing the screw and securing it. You may need to grind down the head of the screw and existing rivet a little for clearance purposes.
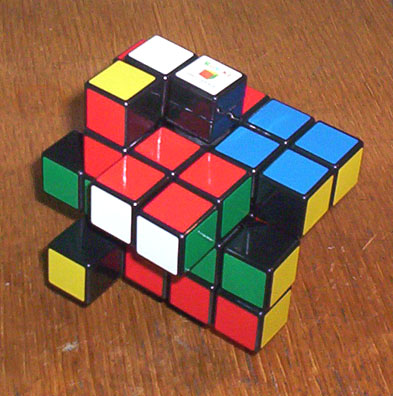
Here is the final puzzle once assembled and lubed. If you kept the tolerances tight but made sure to round off any edges you should still have a tight, smooth turning 3x3x5 puzzle ready to be stickered. Enjoy!

Click HERE for a larger picture of the completed puzzle.
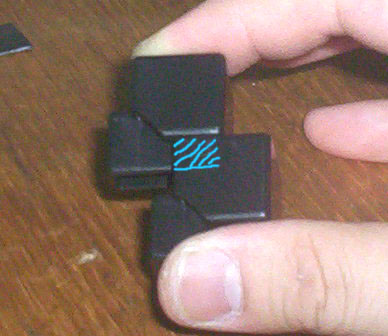
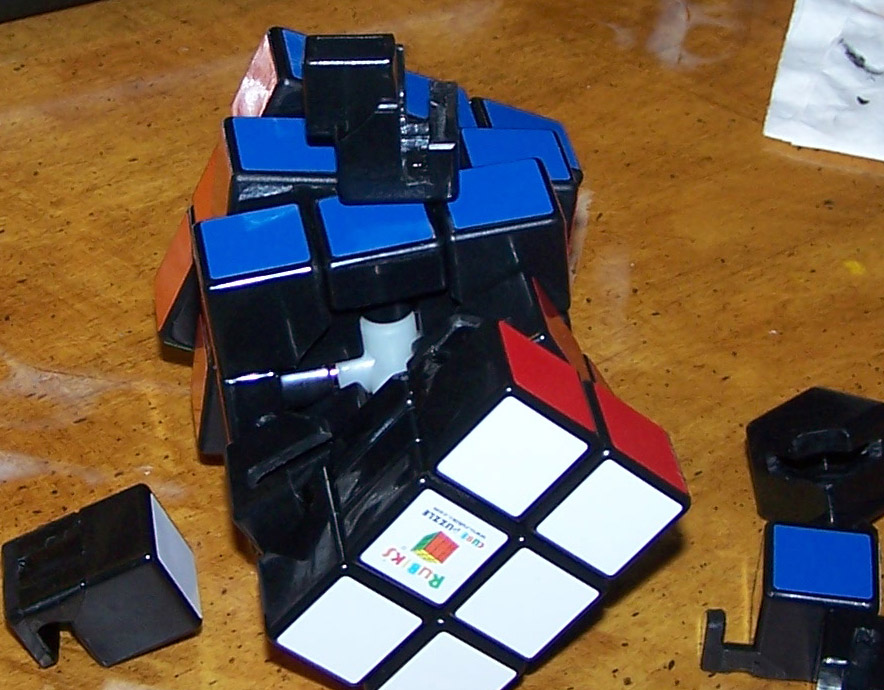
One final pic of the inner mechanism. The violet color lines are the important edges when sanding. The yellow arrows point to these critical edges. The turquoise color lines indicated that the puzzle pieces must line up as closely as possible to the pieces below them. This is done by carefully sanding along the violet lines. Good luck to prospective builders!
Based on discussion on the twistypuzzles.com, it was obvious that a few improvements could be made to the design. Ultimately the rounded centers on layers 2 and 4 were dispensed with, but the inside corners were slightly trimmed to make turning much smoother. The center cubes on 1 and 5 were glued directly to 2 and 4 and do not need to turn independently.
The final improvement was to add small wedges inside the edge pieces on 2 and 4 so that the corner pieces on 1 and 5 do not bind up while in mid-turn. With the wedges in place it is not as important to make the straight cuts on the edge pieces to be perfect (straight purple lines in the picture above) but for corners this is probably still more practical and doable than adding wedges. Also by keeping the cuts precise the puzzle will also look better when turned and the layers exposed.
To make the wedges I just cut small pieces of the 1/8" sheet plastic I used for making the feet and glued them up inside the layer 2 and 4 edge pieces. The 1/8" sheet was a bit too thick so I used some 220 grit sandpaper to thin them down a little. The fit was just enough to keep the pieces in place but not impede movement in any way. The process of adding the wedges is very fast and takes only a minute or two per wedge.
Many thanks to AndrewSeven in this thread at the twistypuzzles.com forum for pointing out the improvements.
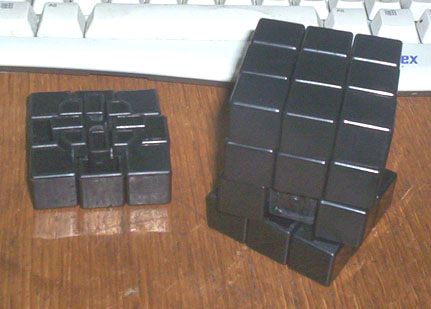
Here are more pictures of the internal mechanism of the puzzle. Pictures were taken with a friend's borrowed camera which is why the images are a lot clearer.