A brief history of the 4x4x5 puzzle: The basic concept for this design came first from Tony Fisher back in late 2003. Tony Fisher used an Eastsheen 5x5x5 as his base and using prosthetics designed a fully working 4x4x5 puzzle. If there was a drawback to the puzzle it was the unusually large size.
In early 2005, Aleh from the twistypuzzles.com forum successfully transformed an Eastsheen 4x4x4 into a 4x4x5 by directly modifying the mechanism and attached pieces. There was much rejoicing.
In early 2007 Adam Zamora also of the forum was the next person to create a 4x4x5 using a method that appeared to be identical to the one employed by Aleh. Two months later, Thomas also used the Aleh/Adam method to create a 4x4x5.
Not long afterwards I used a slightly different way to create the puzzle, varying primarily on the construction method of layers 1 and 5.
I've pondered the question of whether I should reveal this information or not, as though there is some secret society that prevents the knowledge of construction from being shown to the masses. I considered the ramifications of what fellow puzzle builders might say, positive or negative.
Ultimately I made my decision based on the idea that knowing how to juggle does not make you a juggler, so the puzzle done right will remain a rare piece.
Here before you now is my 4x4x5 inside and out.
The following pictures are scaled down. To look at the full sized picture, click on the picture itself.
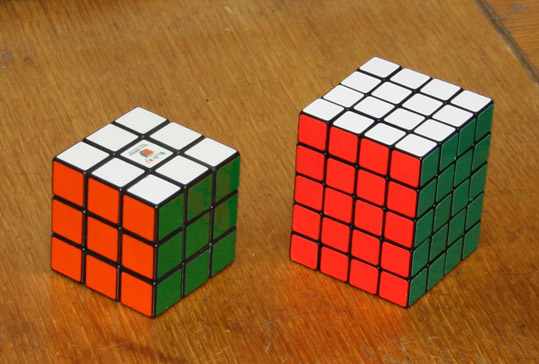
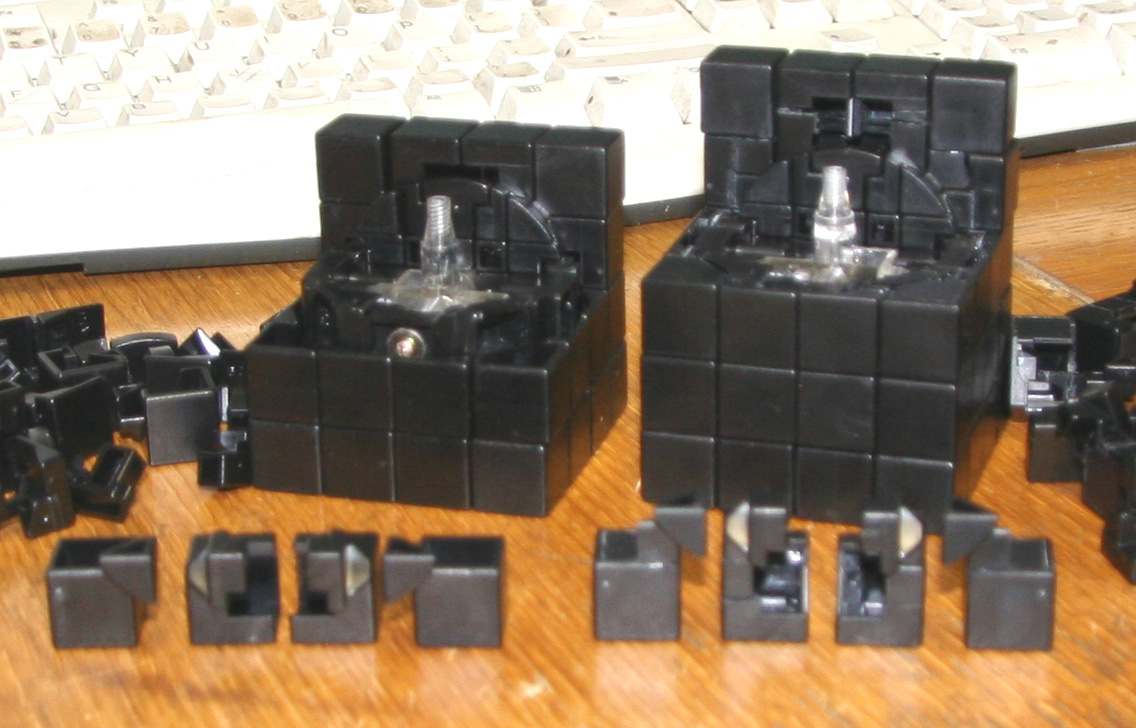
Comparison between an Eastsheen 4x4x4 and the 4x4x5. Missing pieces on the top of the 4x4x5 intentionally left out. Also note the small caps on the bottom layers to prevent being able to "look inside." Those caps do not exist on the standard Eastsheen puzzles.
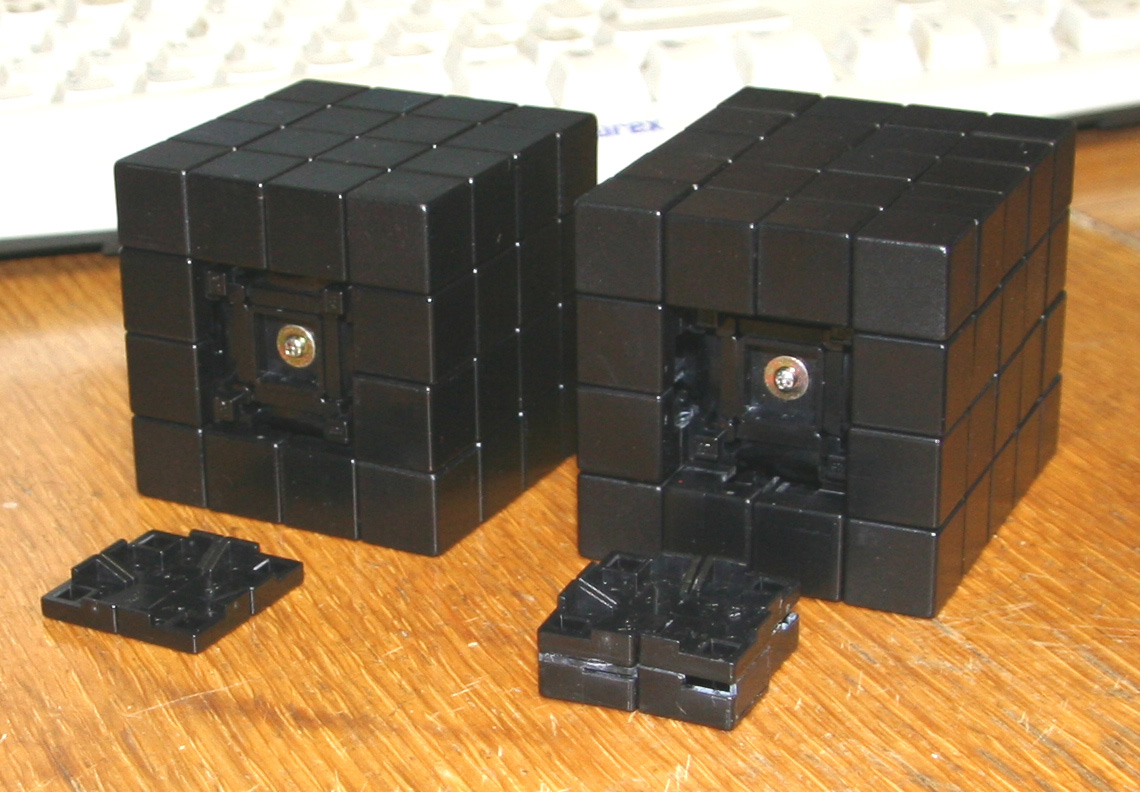
Good view of the tops of the puzzles, exposing the disassembling screw.
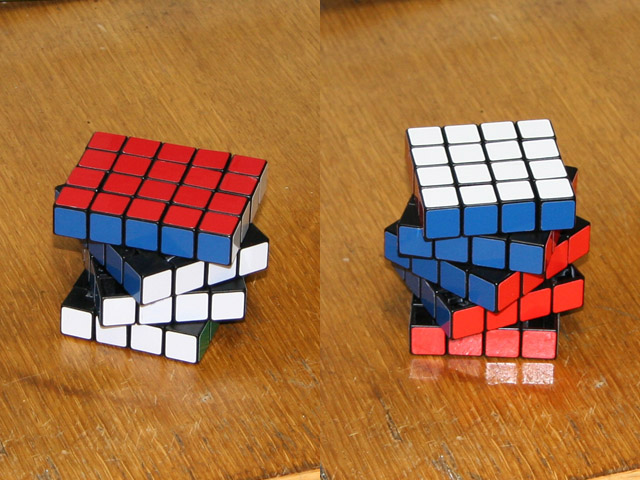
Inside of the puzzles exposed. Note the Eastsheen puzzle pieces in the foreground. Note how the 4x4x5 pieces of layers 1 and 5 are stretched out to accomodate the extra width needed with the creation of the normally invisible layer 3.
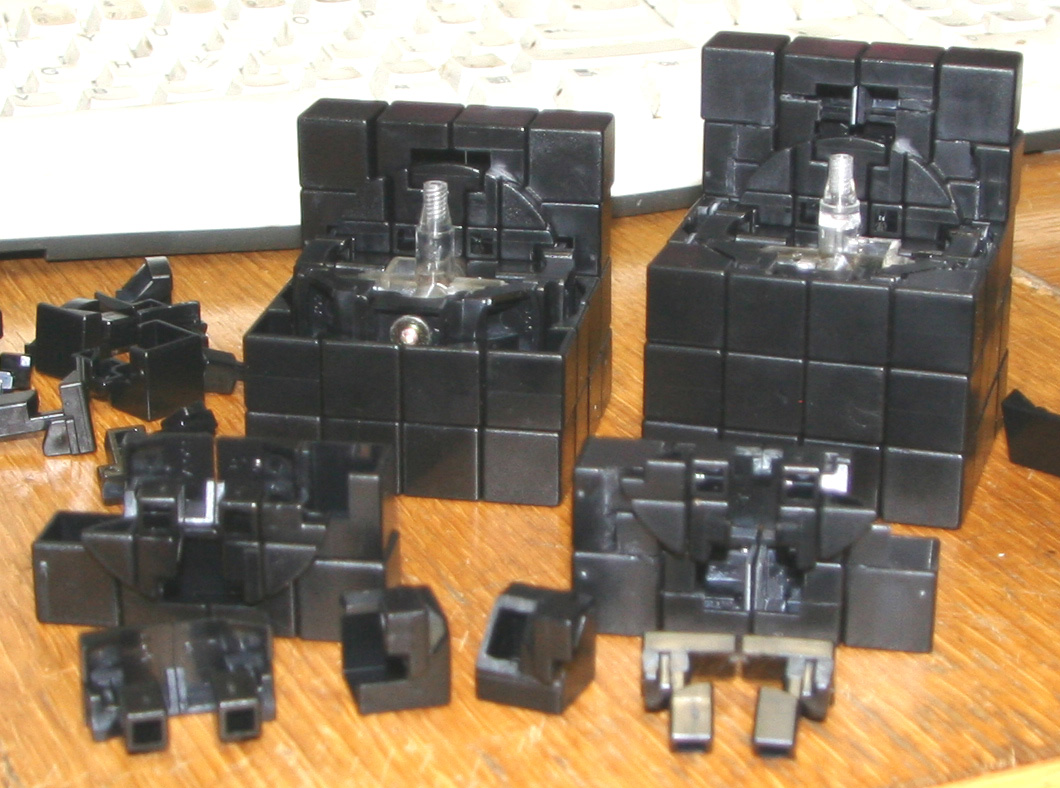
Another comparison view, showing how the pieces fit together between layers 5 and 4. The inner mechanism of the Eastsheen 4x4x4 is essentially intact. It's just that a fake layer 3 is built up while all the other layers are pushed out half a cube's width.
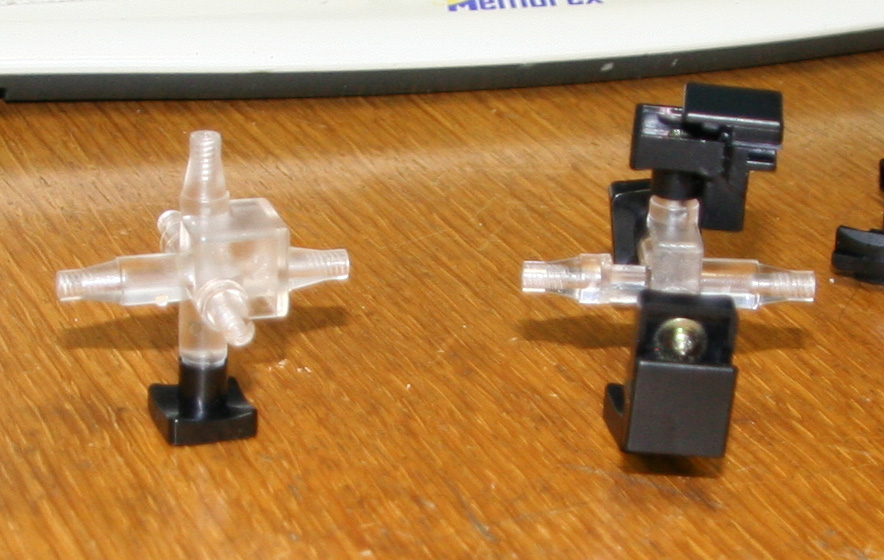
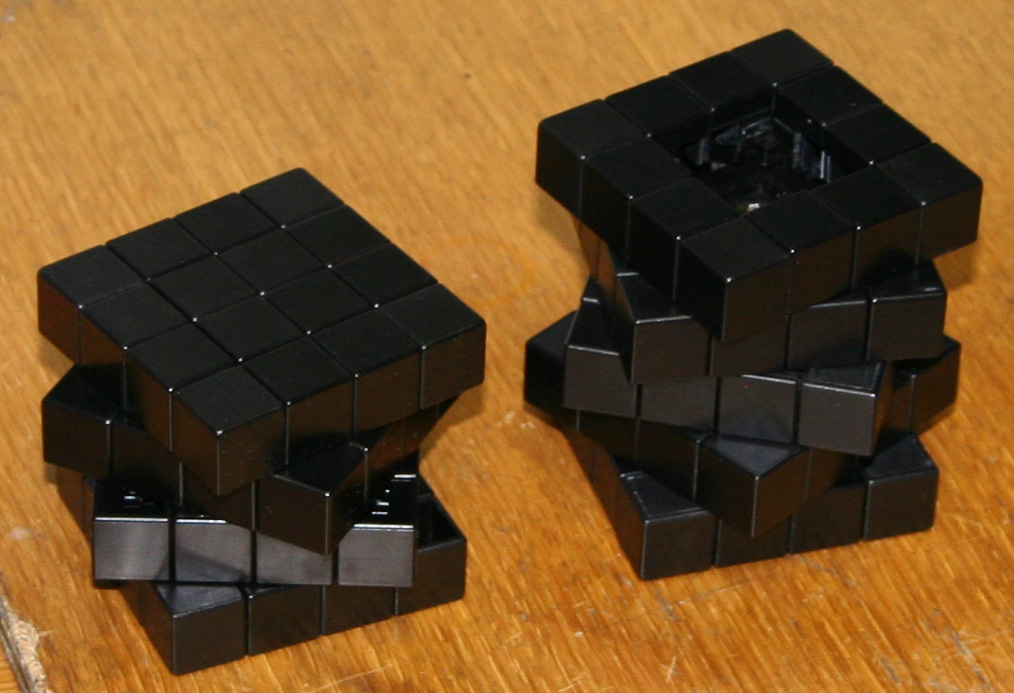
Comparison of the internal spiders. The internal blocks can be completely eliminated if you so choose so long as two adjacent spider arm points have an extra piece glued to them. The only reason I left part of that block intact was that it made for some testing a little bit easier.
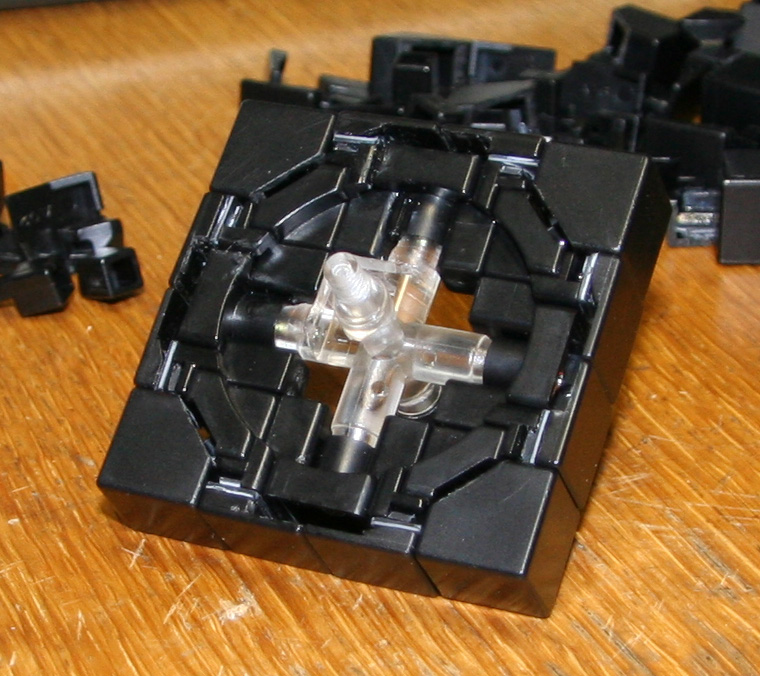
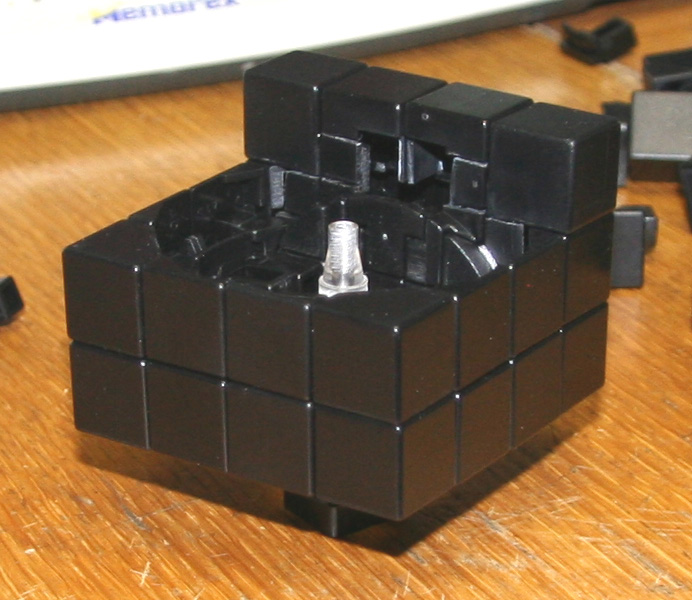
This is the normally invisible layer now fully built up. All other cubes get pushed out by half a cube's worth because of this.

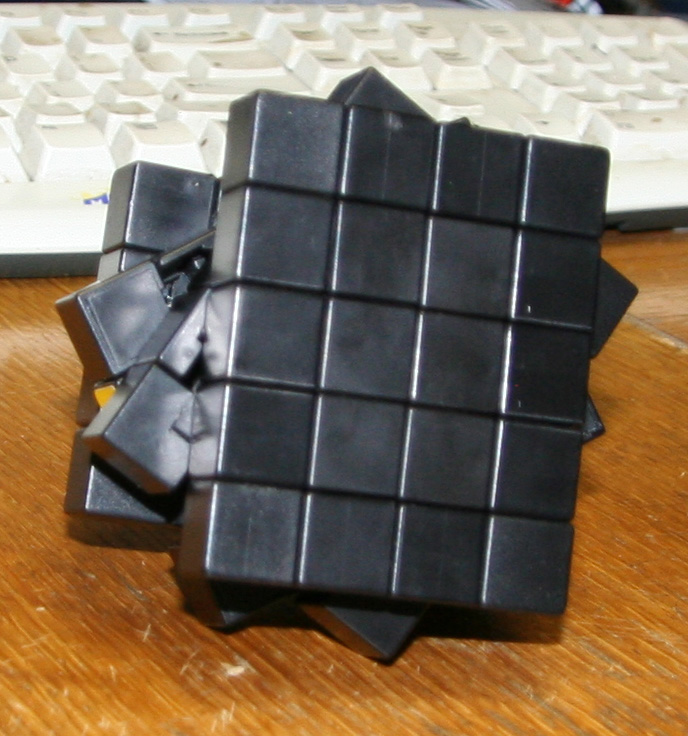
This is layer 4 or layer 2. While I give you no specific construction advice, I will say that the middle cubie pieces of this layer are the key to initial building of this puzzle.
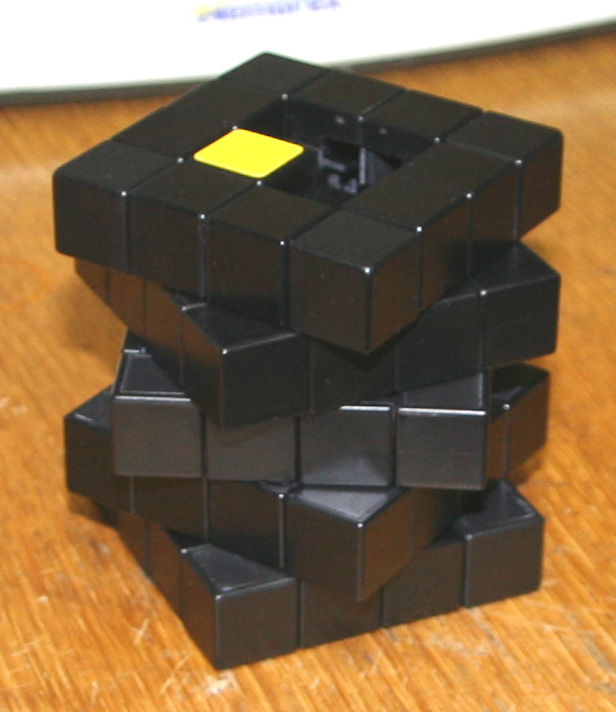
Only partial layer 5/1. Again, you can clearly see how the cubes were extended down.
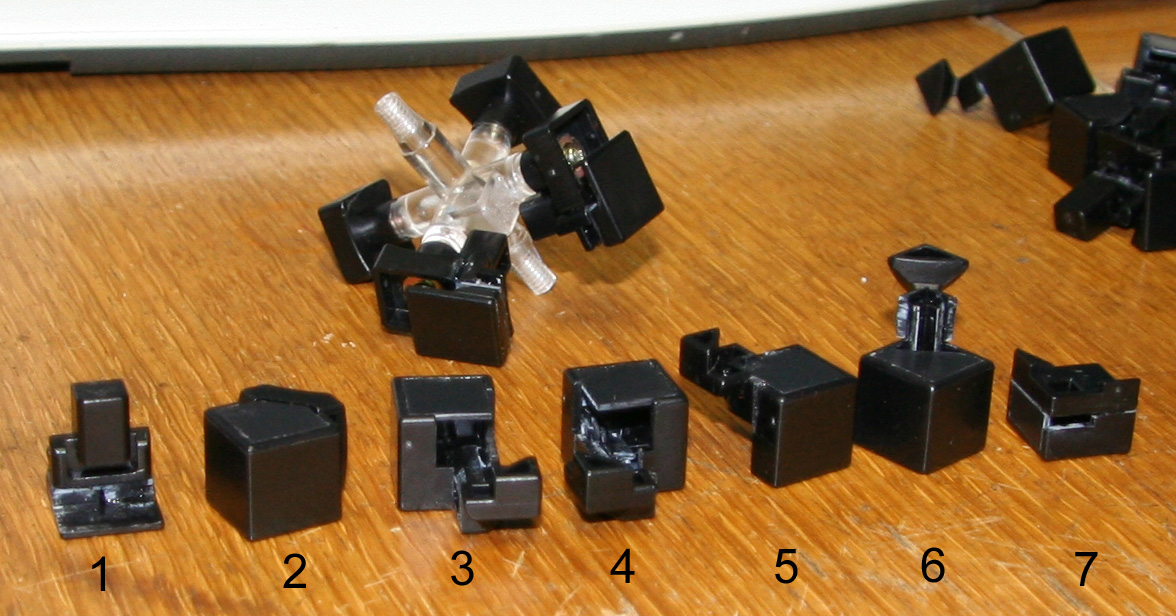
Quick rundown of the parts needed:
1. 8x Layer 3 inner cubie
2. 4x Layer 3 edge cubie
3. 8x Layer 1/5 inner edge "left" cubie
4. 8x Layer 1/5 inner edge "right" cubie
5. 8x Layer 2/4 edge cubie
6. 8x Layer 1/5 corner cubie
7. 8x Layer 1/5 inner cubie
8. 1x inner core
Not shown:
A. 8x Layer 2/4 inner "left" cubie
B. 8x Layer 2/4 inner "right" cubie
Why bother capping the puzzle pieces? Because it needs it. A lot of internal surgery needs to be done to make it all work and it's not very pretty to look at. Frankly it looks good with the big holes covered anyway.
A much better look at the caps on layers 1, 2, and 3. Or 5, 4, and 3 if you prefer.
There are no construction notes. The puzzle doesn't really require any and I'm too tired to write something up anyway. Dimensions of the puzzle are 60mm wide by 75mm tall, as expected from adding an extra layer to a 4x4x4.
Would I construct one for you? Well, yes and no. If you really have to ask how much, then odds are you don't really want to know. Do you want the holes covered up or not?