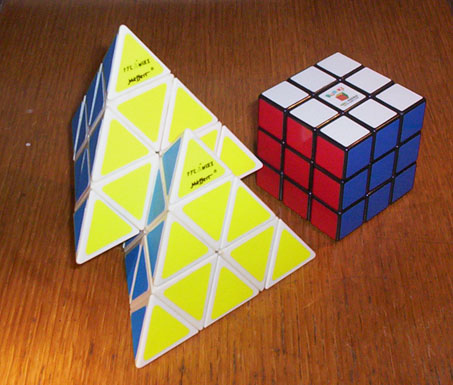
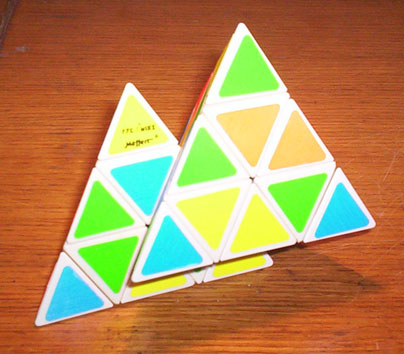
The joined Pyraminx idea appears to have been first proposed by Adam Zamora of the Twisty Puzzles forum. His first concept was for the tip of one Pyraminx to be joined with the edge piece of a second, thus creating a fused puzzle:
After some discussion with him at the recent Rubik's Cube tournament at CalTech, Adam proposed the idea of bridging two Pyraminxes by a single modified edge. Thus the "Siaminx" was born.
There are no plans to produce this puzzle. However if you want me to make a bridging edge piece for you then the cost is $10 for that. Call me picky but bridge pieces are only made from brand new Pyraminxes from Mefferts or Tomy. This assures that the pieces will be of predictable quality and that they won't have grooves worn into them from lots of prior use.
Only 3 bridges can be made from a single $16 or $18 Mefferts Pyraminx. Add to that the minimal building cost and worldwide shiping. If that does not sit well then contact me for an address where you can send two edge pieces and $2 to cover shipping.
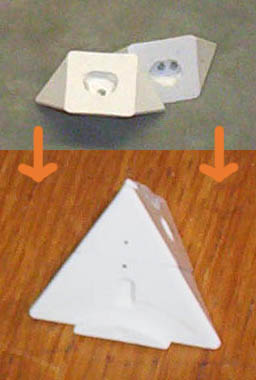
The best bet however is to make your own. Here's quick intructions. Start to finish is roughly 20-80 minutes depending on your relative skill and level of precision and having a grinder really helps for the initial steps. Afterwards sanding by hand is probably best. The picture sequence for the "how-to" uses two pieces off of a used unknown pyraminx that that had their tongues ground off of one side, thus are no longer suitable for actual use. The pictures are for demonstration only.
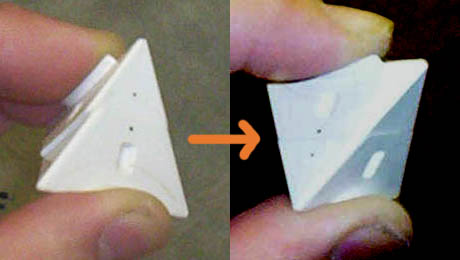
Take two edge pieces and cut/grind about 40 percent off of the end opposite of the edge piece's tongue. If you cut too much off of one you can compensate by cutting less off the other. Ideally though you want the two pieces to be cut down to about half so that the joining faces have large square surface areas. Plus you want to retain the small indent holes that allows the Pyraminx's "click" mechanism to work for both halves of the Siaminx.
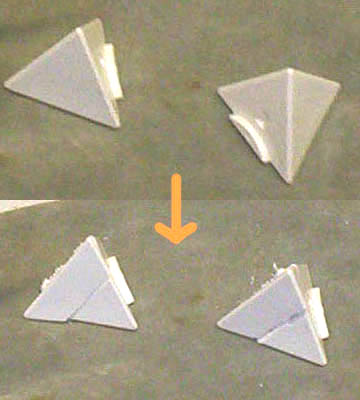
Once you've achieved a rough cut, sand down the faces flat by rubbing the pieces across flatly laid down sandpaper. Use a steady hand and keep mating the surfaces together to guide you. Start with a rough grit, approximately 60. Adjust for uneven surfaces and try to sand the pieces as flat and symmetrical as possible. As the two surfaces get closer to fitting flush, use progressively finer sandpaper. I use 60, 220, and 400. There's little need to use a finer grit.
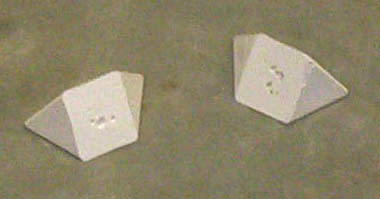
Note that it is better to not cut the pieces down enough than to cut too much. The pieces are not perfectly tetrahedral so trying to sand the pieces to be 100% flush with each other can cause problems. If you sand down the pieces too much then the Pyraminxes might overlap a bit and make twisting it up somewhat difficult. Plus the stickers may start catching a lot and peel off prematurely so don't overdo it with the sanding.
To minimize alignment problems between the two pieces you can use a small dot from a permanent marker to keep the pieces in a particular orientation as the sanding and matching is progressing. As you sand down the pieces, try using a straight edge to make sure that the two pieces are aligned properly.
At this point you can join the two pieces with superglue which will result in a very strong bond. Superglue likes flat smooth surfaces with very little gap. The only problem is that superglue dries fast and cause misalignment if you're not careful. It's pretty much a one shot deal. If the pieces are crooked when you push them together that's the way they'll stay. If you slide the pieces around too much in the few moments of drying, you will end up with a very weak joint that comes apart easily and you'll have to re-sand the mating surfaces for a strong bond.
As a more labor intensive alternative you can hollow out parts of each join surface and drill small holes for a bonding substance like 2 part epoxy or maybe a small dab of polyurethane resin. Pour level amounts of your substance of choice into each hollow and use a pin to "push" the stuff into some of the small drill holes. Then hold the two halves together and clamp. Or, very carefully apply several dots of superglue along the joined edges and wait a few seconds to let dry. Wait for the stuff inside to cure though because superglue applied to just the outer edges isn't nearly as durable as supergluing the flat surfaces.